Kefir sourdough bread offers several potential benefits, including improved gut health, easier digestion, and a lower glycemic index compared to commercial yeast bread. The fermentation process in both kefir and sourdough introduces beneficial bacteria (probiotics) and prebiotics that can aid digestion and support a healthy gut microbiome. Additionally, sourdough fermentation can break down gluten, making it potentially more digestible for those with gluten sensitivities.
I’ve always been fascinated by natural fermentation, and this week, I took the plunge into sourdough baking—with a twist. Instead of using a traditional starter, I experimented with kefir as the base. Kefir, rich in probiotics and naturally tangy, seemed like a perfect candidate for encouraging wild yeast. Here’s how my first try went:
Ingredients:
- Kefir – 50g for the starter
- All-purpose flour – 50g for the starter, 200g for the dough
- Water – 120g
- Salt – 4g
Step 1: Preparing the Levain (Starter)
I started by mixing 50g of kefir with 50g of all-purpose flour in a jar. I stirred it well, covered it loosely with a lid, and let it rest undisturbed at room temperature for 48 hours.
By the end of the second day, I noticed small bubbles and a pleasantly sour aroma—clear signs of fermentation when openned the jar. Success!
Step 2: Mixing the Dough
On baking morning, I mixed:
- 90g of my kefir starter
- 120g of water
- 200g of all-purpose flour
- 4g of salt
I stirred everything until just combined, then let the dough rest for 1 hour (known as the first rise or start of the bulk fermentation).
Step 3: Stretch and Folds
To develop strength and elasticity in the dough, I did four sets of stretch and folds, spaced 30 minutes apart. This step is crucial for structure, especially when working with a relatively young starter.
Step 4: Rest and Rise
After the final fold, I let the dough rest for another 4 hours. The dough had risen about 40–50%, which I considered a good sign of fermentation, especially for a first try.
Step 5: First Shape and Bench Rest
I gently shaped the dough into a round and let it rest on the countertop for 30 minutes, covered lightly with a towel.
Step 6: Final Shaping and Proof
Next, I performed the final shaping and placed the dough into a rice floured banneton. I let it proof at room temperature for 2 hours.
Step 7: Bake
I preheated my Dutch oven to 500°F, when placed the dough inside lower to 460F :
- Bake covered for 20 minutes-460F
- Bake uncovered for another 20 minutes-440F
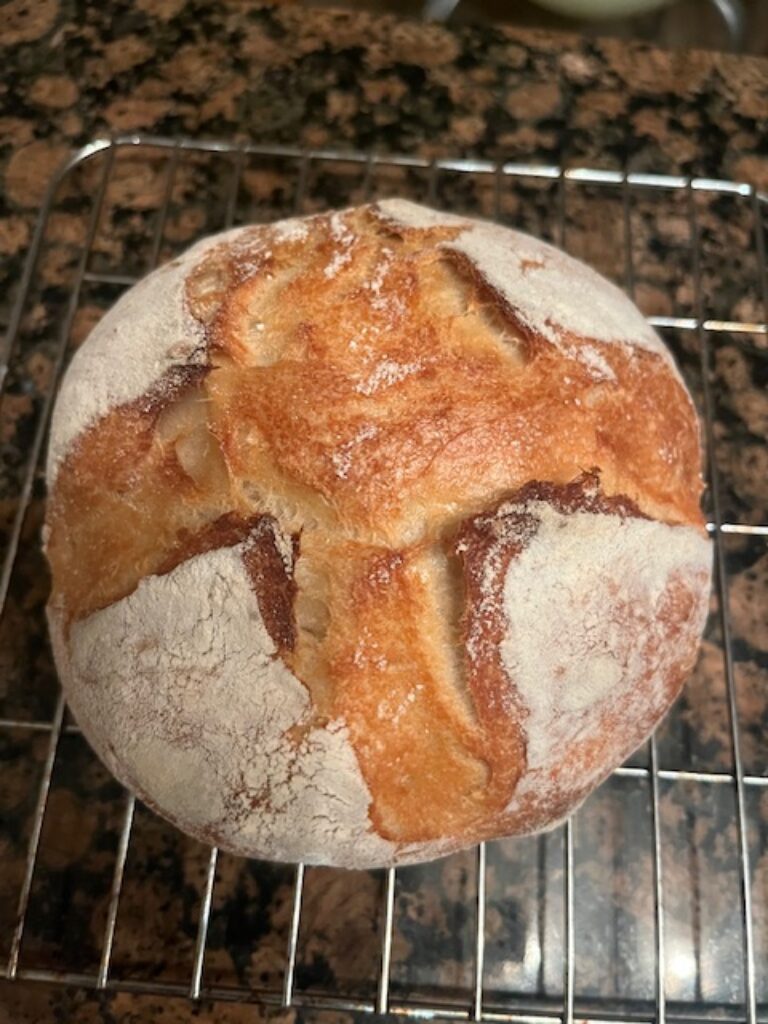
The result? A beautiful, golden loaf with a crisp crust and soft crumb with very pleasant taste. The final weight of the loaf was 340g.
Final Thoughts
Using kefir as a sourdough starter was a rewarding experiment. The flavor was subtly tangy, and the texture surprisingly good for a first go. Next time, I might try a longer cold ferment or incorporate whole grain flour for added depth.
From the result, I can see that next time I need to work better on shaping, and I’ll probably try an overnight cold fermentation to further improve flavor and structure.
If you’re into fermentation or just curious about alternative sourdough methods, I highly recommend giving kefir a try as a starter base. It’s beginner-friendly, and honestly, quite fun to watch it come to life.